Chopsuey

To give a bit of just about self, I would say I can never be a Chinese fanatic (sorry, for the lovers, but that’s the irony!). But what lines my plate of Chinese is the American chopsuey! I visit the Chinese restaurants for only one sole thing and that is this Chopsuey. I remember my first lick of it when I was 7 or 8 years old, and I was served with this dish on one of my weekend escapes to Shillong! I first had it in a restaurant of the hotel ‘Pine Wood’ and since then, the taste had stuck in some corner of my tongue. Amidst this quarantine, I was wishing to have it from my favourite Chinese house, but it wouldn’t have been possible. So today, I planned to cook it in Shweta’s cookhouse instead! Usually Chopsuey has a sweet and tangy taste of tomatoes, but I love my Chopsuey with a hot flavour. So I add on this spicy flavour to it with whatever ingredient is available to me at the time, be it garlic chilli paste or anything of that sort.

So here’s how I made it-

Ingredients:

200 gms noodles ( boiled till al dante)

Sliced vegetables ( cabbage, carrots bell peppers)

2 tsp chopped ginger

2 tbspn chopped garlic

2 tsp sugar ( can be adjusted according to taste)

1 tsp vinegar

1tsp soya sauce

Salt to taste

2 tsp tomato ketchup

2 tsp red chilli sauce

2 tbspn cornflour + 2tsp water ( made into slurry)

Oil for frying + for sauce

Approximately 1.5 cups of water for gravy

Method

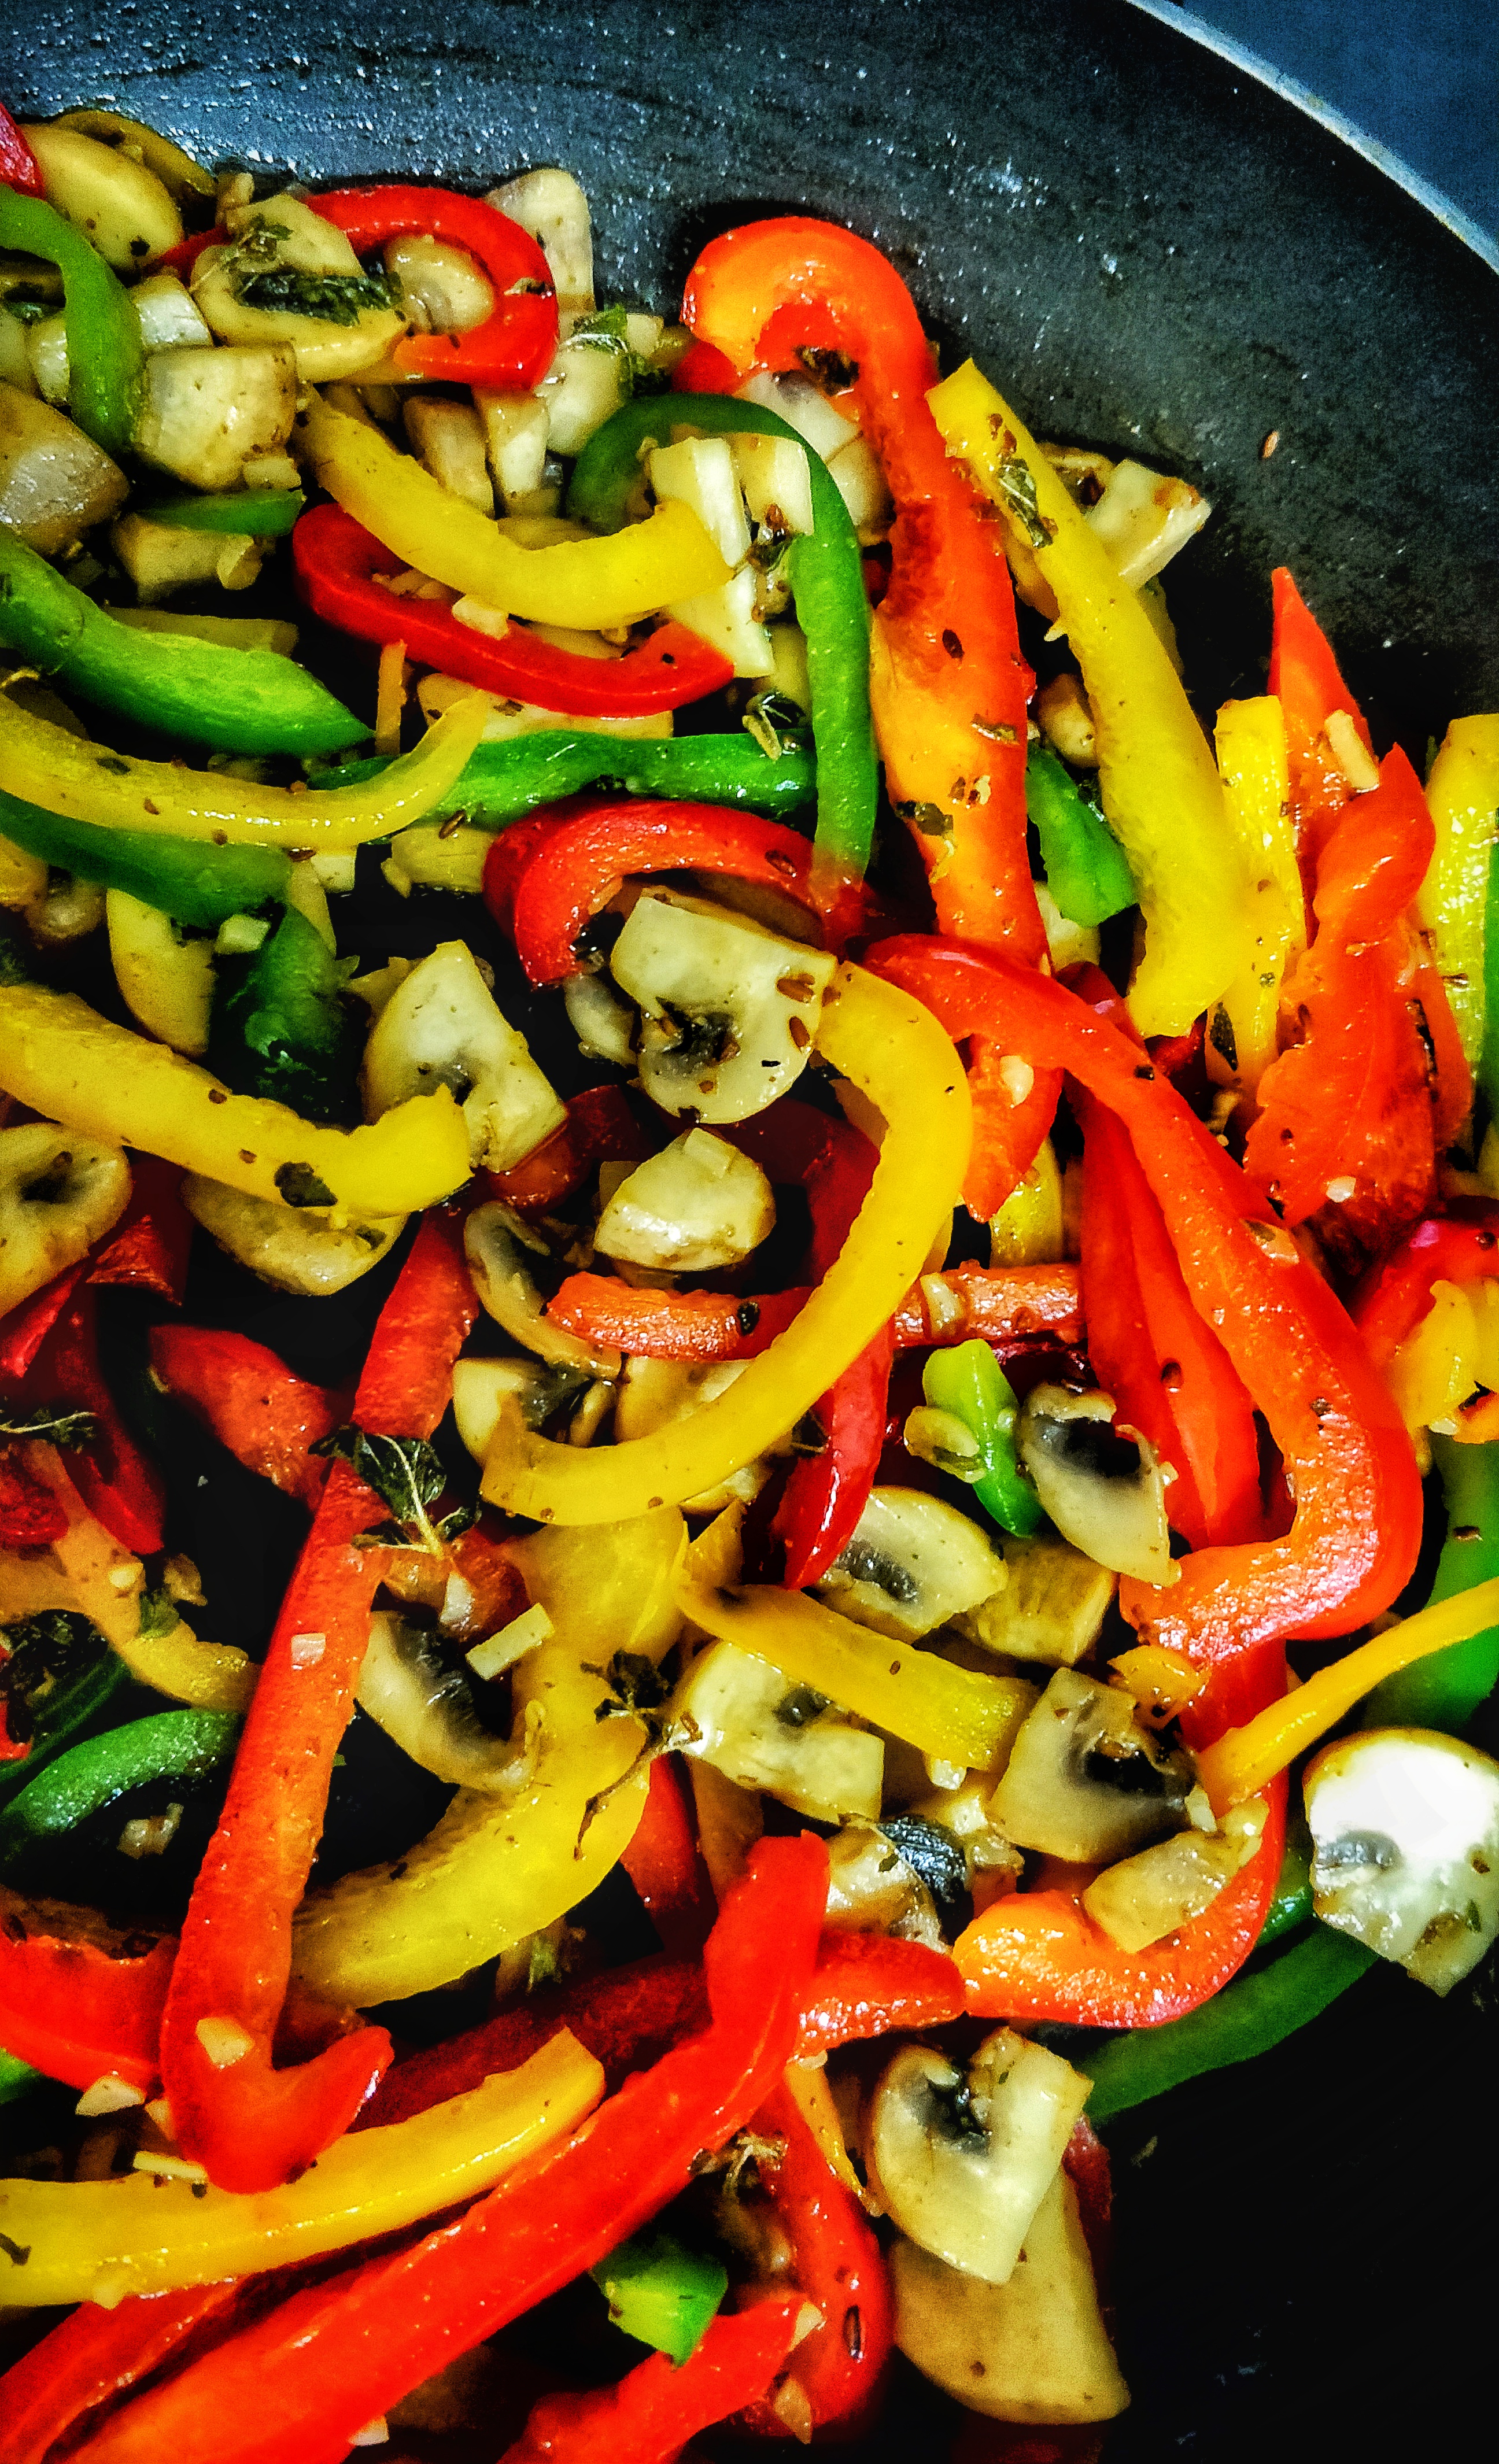
Drain the boiled noodles and let the water drain completely. Heat oil in a pan and fry the noodles. ( Take some boiled noodles in your hand and shape it like a nest and fry). Drain excess oil on a kitchen napkin. In another pan heat 2 tbspn oil, add the chopped ginger and garlic. Saute for 2 mins and then add hard vegetables like cabbage and carrot. ( You can also add the vegetables like babycorn, Mushrooms. Pineapple tastes awesome. Add sprouts for some extra crunch and tofu for that protein). Saute for a while and then add the peppers. Sprinkle salt n pepper. Add all the sauces and sugar, mix well. Now add water.( Around 1.5 cups or accordingly). Let it boil. Now add the cornflour slurry. Let it thicken. You can add in some more cornflour slurry if required.

In a serving bowl put the fried noodles and top it with hot gravy.

Good food= Good mood

Bhapa Sondesh

When I sat back to remember my Khanapara days (of childhood, I could recall the times when my dada used to bring the kids our favourite sweet delicacies – Bhapa Sondesh for breakfast! The sweet memories caught me up and made me eager to try my hands on it and pass on the legendary taste to my little one! I tried to parallelise it with other sweet treats but nothing could ever match its subtle steamed taste. Steamed cake from Mishti Mukh (a prominent sweet house in Guwahati till date) had been slightly relatable to match the dish, but never completely. Bhapa Sandesh is one of a kind! It is a mix of mild flavours that you would rejoice till the last bite. It’s an amalgamation of mere 3 ingredients- Milk, sugar and cardamom! And to share this special sweet memory that made me nostalgic, here’s how I started with it –

Ingredients

1 lt full cream milk ( made into paneer using lemon juice )

4 tbsp powdered sugar ( you can adjust according to your taste)

1 tbspn milk

2 tsp ghee

1 tsp cardamom powder

Saffron strands

Pistachio sliced

Method:

Blend all of the above ingredients into a fine paste. Donot add more than a tbsp of milk for the above mentioned quantity of milk. The paste should be thick and smooth at the same time. Grease moulds or steel katoris ( I used steel katoris). Fill the katoris with the paste, place 2-3 strands of saffron on each Bowl and cover it with foil paper. (I could fill 3 katoris). Place the katoris in a steamer and steam for 15 mins or till the toothpick when inserted comes out clean. Garnish with sliced pistachios and Refrigerate for an hour.

Note: If you donot have a steamer you can use idli maker, pressure cooker or a rice stainer to steam.

You can add flavoured essence ( rose, kewra) to the paste to enhance the taste.

Do let me know in the comments below if you like my recipes.

Guilt- free PIZZA!🍕

Pizza

It’s almost summer and lockdown has already covered us all inside our nutshells keeping us munching all day under our comfort corners. With ample time in hand, cooking and creating new things is the new art that everyone is trying their hands on. Keeping up this spirit of cooking with the most available ingredients in the kitchen counter is what I started my day with when my son was craving to feast on a pizza. Such delicacies could be unhealthy right? High on calories, fats, and sodium content food topped with cheese and salty meats could hamper the kids’ health! 

So here I came up with a nutritious idea that would boost the dish with loaded freshly grilled veggies along with homemade dough,cheese and sauce. Limitations of ingredients and the hang of healthy food is what drove me to the conclusion of making a guilt-free, homemade whole wheat pizza! So here’s how I began with the process and the ingredients that I compelled to get started with the yummy boon!

For the dough you’ll need:

2 cups of whole wheat flour

2 1/4 tsp yeast

1cup warm water

1tsp salt

1tbsp neutral oil ( I used Olive)

1/2 tsp sugar

Method

In a bowl add 1/4 cup warm water and sugar. Let it dissolve and then add yeast. Stir it and keep it aside for 10 mins or till frothy. Meanwhile in another bowl take the flour, add salt and oil. Pour the water with yeast on the flour and knead the dough with the remaining water. Grease a Bowl and keep the dough covered for an hour or until doubled.

Meanwhile the dough is getting ready we can prepare the pizza sauce. Ingredients required for the sauce are as follows:

4 tomatoes blanched, peeled and pureed

2 tbsp tomato puree

1tbsp chopped garlic

1 chopped onion

Salt and pepper to taste

1 tbsp Italian seasoning

1 1/2 tbsp torn basil leaves

1 tbsp olive oil

Method:

In a pan heat olive oil, saute garlic and onions. As soon as the onion turns translucent add the tomatoes. Mix well. Saute for 5 mins. Now add the seasoning, salt, pepper and the basil leaves. Mix well. Cook till the sauce thickens. Let it cool.

For toppings just grill some vegetables, like Mushrooms, bell peppers, spinach, corn, onion, tomatoes, zuchinni etc. In a pan add oil, thrown in the chopped vegetables add salt and pepper and sautee it for 5 mins. Let the crunch be there.

Making cheese is not at all tricky, you just need two simple ingredients. It might not taste as the store bought mozzarella but I’m sure you won’t miss the cheese in your pizza!!

Homemade Cheese

For cheese you’ll need:

1 lt full fat milk

4-5 tbsp vinegar

Cheesecloth to strain

Ice cold water

4 tbsp salt

In a pan heat milk just enough when you can’t put your finger in. Switch off the flame and add 1 tbsp vinegar. With a spoon start stirring the milk slowly. The milk will start curdling. Keep adding vinegar till all of the milk curdles and you see the greenish whey. Strain the cheese and reserve the whey. Make a ball of the cheese and squeeze out extra water. Let the cheese ball rest in again in the warm whey for 2-3 mins. (You can use the whey to knead dough for rotis, cook dal etc). In a bowl of ice cold water add salt and leave the cheese ball for 30-40 mins. Wrap in a cling film and keep it in the fridge. You can store it for 2-3 days, not beyond that. You can make the cheese a day prior.

Let’s get rollin’

Once your dough is doubled, take it out on a clean surface and punch down the dough with your fist. Knead it for a minute and cover it again for 5-7 mins. Make a small ball and roll it using a rolling pin. Place the rolled dough on a parchment paper. ( If using Pizza tray sprinkle some polenta ( corn meal) or rava to avoid sticking of the dough)

Polenta
Rolled Dough

Make a lip or crust around the edges as shown in the picture. Using a fork make some holes. Now spread the pizza sauce. Add cheese, fresh basil leaves , olives and sauteed vegetables. Not to forgetpreheat oven for atleast 20 mins at the highest temperature. And keep the oven on between placing the pizzas.

The crust / lip
Fork used for making holes

Place the pizza in the centre of your oven and bake for 15 mins or till the edges seem cooked and turn brown.

Voila!!!! Im sure this is gonna be a treat for you and the kids. Share your experience in the comments below.

Happy Baking!!

Bisi Bele Bhath

Bisi bele bhath is a spicy, rice-based dish with origins in the state of Karnataka, India.Bisi bele bhath, which translates to ‘hot lentil rice dish’ in Kannada language, is a wholesome meal. It is said to have originated in the Mysore Palace and Vellore fort and from there spread across the entire states.
The traditional preparation of this dish is quite elaborate and involves the use of spicy masala, toor dal (arhar) , rice, ghee and vegetables. Spices like nutmeg, asafoetida, curry leaves and tamarind pulp contribute to its unique flavour and taste. Some versions of the dish are prepared with up to thirty ingredients.

It is served hot and sometimes eaten with chutney, boondi, salad, papad, or potato chips. This dish is commonly found in restaurants that serve the Udupi cuisine. The masala used is available off the shelf.

To make this dish you can use store bought masala or make it at home. I am also sharing the masala recipe below. Rice and dal can be cooked together or separately ( i cooked it together). You can adjust the level of spice according to your taste. The dish might get thick after sometime, you can add boiling hot water and a tsp of ghee to adjust the consistency.

For masala you need:

4/5 dried red chillies
1inch cinnamon stick
3 cloves
1 tsp cumin
1tsp urad dal
1tsp chana dal
1/2tsp methi dana
2tbspn coriander seed
2tbsp dessicated cocunut

Dry roast the ingredients and blend it into fine powder. You can store this masala in a dry bottle for later use.

Ingredients for making bisi bele bhath

1/2 cup rice
1/4 cup arhar dal
1onion finely chopped
1lemon sized ball of tamarind soaked in water
salt to taste
1tsp turmeric powder
1tbsp ghee
1/2cup mixed vegetable chopped (potato,peas,beans Carrot, capsicum)

For tempering:
1tbspn ghee
1sprig curry leaves
8-10 cashewnuts
5-6 peanuts
2 dried red chillies
a pinch of asafoetida (hing)
1/2 tsp mustard seeds

Method:
Rinse rice and dal Thoroughly in water. Soak them in water for an hour. Boil them together or separately adding salt and turmeric powder. Rice and dal must be soft.
In a pan add ghee and saute onions till translucent. Add chopped vegetables and cook till done. Take out juice of the soaked tamarind and add it to the cooked vegetables.
Add 2tbsp of bisi bele bhath powder amd mix well. Add cooked rice and dal, mix ver well. Add water if required and cook for 5 mins and let the powder incorporate well in the rice. Check for salt and add if required. Donot thicken much, it will thicken further after cooling.
Prepare the tempering in another pan. Add ghee, dried red chillies and hing. Splutter mustard seeds. Then add curry leaves and the nuts. Let the nuts cook till brown. Pour it over the cooked rice.

Serve hot with potato chips and raita.

For quick potato chips, peel the potatoes and using the same peeler peel thin slices of potatoes. Wash them with water and spread on a cotton cloth and let it dry in sun for about 2 hrs. Fry and sprinkle chaat masala and chilli powder. Store it in an airtight container for later use.

Thai Red Curry

Red curry is a popular Thai dish consisting of red curry paste cooked in coconut milk  with meat added, such as chicken, beef, pork or shrimp. Vegetarians can add tofu, assorted vegetables etc.

The base Thai red curry paste is traditionally made with a mortar and pestle and remains moist throughout the preparation process. The red colour is derived from dry red chillies. The main ingredients include (dried) red chilli, peppers, garlic, shallots, galangal,fish oil, salt. keffir lime leaves, coriander root, coriander seeds, cumin seeds, peppercorn and lemongrass.

Today, the prepared Thai red curry pastes are available at markets produced in mass quantities, and also available in bottled jar produced by some brands.

The prepared red curry paste is cooked on a saucepan with cooking oil, to which coconut milk is added.Then the meat/ vegetable as protein source is added into the curry-base soup. This dish normally has a soup-like consistency and is served in a bowl and eaten with steamed rice.

  • The secret to making amazing Thai curries is to use plenty of aromatics, like onion, ginger and garlic.
  • Choose full-fat coconut milk for its richness (you won’t regret it!).

The easiest and most flavorful homemade Thai red curry you will ever make in just minutes! It is as flavourful as the restaurant version… Let’s jump over to the ingredients

Ingredients: (for red curry paste)

2 red pepper ( roasted on flame and peeled)

2 tomatoes chopped

1 onion chopped

1/4 cup tomoto puree

1tbsp grated ginger/ galangal

5 cloves of garlic

Juice from 1/2 lemon

1/4 cup of lemongrass chopped

5 dry red chillies (boiled)

1/2 cup of coriander ( including leaves, stem and the roots)

2 tbsp light soya sauce

1tsp turmeric powder

1tsp chilli powder

1tsp cumin powder

5 peppercorns

Salt to taste

( for curry)

1 1/2 cups of chopped assorted vegetables ( coloured bell pepper, tofu, mushrooms, pokchoy, baby corns etc)

1 cup coconut milk

Oil

Red Thai curry paste

A bunch of fresh basil leaves

Method:

Take all of the ingredients mentioned for red curry paste in a blender and blend well. In a pan hot 2 tbsp oil and pour the paste. Cook till oil separates. (You can store this paste in a glass bottle for later use. Stays well in the refrigerator for a week).

In another pan add 2tsp oil, add the curry paste and vegetables. Mix well. Cover the lid and cook on low flame till the vegetables are cooked. Pour coconut milk, and bring to a boil. Switch off. Add basil leaves. Serve hot with rice!

You just can’t eat good food, you’ve to talk about it too!!

Do write to me in the comments below if you like the recipe.

Have a good day!!!!

Coconut Cookies

A cookie is a baked or cooked food that is typically small, flat and sweet. It usually contains flour, sugar, and some type of oilor fat. It may include other ingredients such as raisins, oats, chocolate chips, nuts, etc.

The most common word for a crisp cookie is biscuit. The term cookie is normally used to describe chewier ones. However, in many regions both terms are used. The container used to store cookies may be called a cookie jar.

Cookies are most commonly baked until crisp or just long enough that they remain soft, but some kinds of cookies are not baked at all. Cookies are made in a wide variety of styles, using an array of ingredients including sugars, spices, chocolate,butter, peanut butter, nuts, or dried fruits. The softness of the cookie may depend on how long it is baked.

Cookies make great gifts, and the heavenly smell they leave in the kitchen is certainly a perk. 

Have you ever made your own coconut milk  (click here for the recipe) only to be left with a handful of leftover coconut pulp and nothing to do with it? It’s too valuable to throw away, but what in the world are you supposed to do with it?

It’s actually really simple. Just use it as you normally would use dried coconut. 

You can make these easy peasy cookies, in just an hour’s time. This recipe is really simple and needs only a few ingredients.

Let’s move on to the recipe.

Ingredients:

1 cup all purpose flour

1/2 cup dessicated coconut + 5bsp for dusting ( I used left over coconut pulp from making coconut milk, you can use store bought also)

1/2 cup unsalted butter

1/2 cup powdered sugar

1/2 tsp baking powder

1 tsp vanilla essence

1/2 tsp coconut milk or regular milk

1/4 tsp salt

Method:

Sift flour , salt and baking powder in a bowl. Add dessicated coconut and mix well. In another bowl take butter and sugar and whip till light and airy. Add vanilla essence and mix well. Now add the flour in three parts, slowly incorporating the butter. Gently bring the dough together, donot knead. Add milk and mix to get a soft dough. Take little dough at a time and roll it to make small balls. Press between your palms and dust with remaining coconut.

Preheat oven at 180 degrees. Place the dough on parchment paper, keep distance between the doughs. Bake for 15 minutes or until brown.

Place on wired rack for cooling. Store in an airtight container.

Bake the world a better place.

Coconut Milk

Homemade coconut milk

Coconut milk comes from the white flesh of mature brown coconuts, which are the fruit of the coconut tree. The milk has a thick consistency and a rich, creamy texture.

Thai and other Southeast Asian cuisines commonly include this milk. It’s also popular in south Indian cuisines also. ( mainly Kerala).

Coconut milk is classified as either thick or thin based on consistency and how much it’s processed.

Thick: Solid coconut flesh is finely chopped and blended well with water. The mixture is then strained through cheesecloth to produce thick coconut milk.

Thin: After making thick coconut milk, the grated coconut remaining in the cheesecloth is again blended with little water. The straining process is then repeated to produce thin milk.

If you start making your own coconut milk at home, you will inevitably end up with a lot of left-over pulp. The coconut milk pulp is still very nutritious, high in fiber, low-fat (most of that good fat went into your milk), and storable.

How to use left over pulp?

1) Use it fresh right after pressing, in your smoothies or sprinkle on your salads.
2) Deep freeze your fresh pulp. The best way to store it is by pressing it thinly into a ziplock bag so you can break off convenient chunks without defrosting the whole packet.
3)Dry your pulp, and keep it in an airtight container. I’ve had the best results with a glass jar, can be used later in cookies or making sweets.

If you experiment, I would recommend not adding too much at a time because you don’t want to accidentally make your food too dense or too dry. And please always feel free to share your ideas and inspirations!

Happy cooking, everyone!

Mexican Rice Bowl

Vegetables play an important role in Mexican cuisine. Common vegetables include zucchini, cauliflower, corn, potatoes, mushrooms, red tomato, green tomato, etc. Despite the introduction of wheat and rice to Mexico, corn is the most commonly consumed starch in almost all areas of the country and serves as the main ingredient in many local recipes (e.g. corn tortillas) pronunciation:taw-tee-uhz

The other basic ingredient in all parts of Mexico is the chile pepper. Mexican food has a reputation for being very spicy, but it has a wide range of flavors and while many spices are used for cooking, not all are spicy. Many dishes also have subtle flavors. Chiles are indigenous to Mexico and their use dates back thousands of years. They are used for their flavors and not just their heat, with Mexico using the widest variety. If a savory dish or snack does not contain chile pepper, hot sauce is usually added, and chile pepper is often added to fresh fruit and sweets.

Chipotle, smoked-dried jalapeno pepper, is very common in Mexican cuisine.

Traditional Mexican Cuisine has a distinct taste and it’s made up of a few common ingredients. That spicy flavor is due to things like onions, garlic, chile powders, herbs, spices, and a few that are specific to this style of food. Garlic is among the most common flavors you will find in Mexican food. Oregano and cumin bring a lot to that signature Mexican flavor. They are two of the main herbs used to spice up dishes.

I’m kicking off today with this insanely delicious and colorful Mexican Vegetable Rice Bowl. I love that there are so many vegetarian options in Mexican cooking. There’s also so many dishes, leaving little room for food boredom. This recipe is inspired by Mexican cooking, and it’s basically a bunch of really great ingredients packed into a super filling bowl.

The base of this bowl is Navara red rice . It is the rice of Kerala.Navara has an important place in the Ayurvedic system of treatment and is used, alone or in combination with other herbs to treat many diseases. 

Next ingredient is the Beans. No culture does beans better than the Mexicans. I used red kidney beans ( rajma) for this recipe.

Pico de gallo (pronunciation: pico- de- gayo), also called salsa, is commonly used in Mexican Cuisine. It is traditionally made from chopped tomato, onion, jalapenos, mixed with salt, cumin, lime juice, and cilantro.

Stir fry vegetables add colour and crunch to this recipe. Add vegetables of your choice ( coloured peppers, zuchinni, Mushrooms, broccoli), tossed in oil and herbs.

Lettuce,it is nearly impossible to relish a hearty salad, sandwich or burger without some crispy lettuce leaves, it certainly adds soul to your favourite delicacies. 

Cheddar Cheese, is a great choice to use it a side with your rice Bowl.

Let’s get started with the recipe. Boil 1cup of rice( any rice of your choice). Keep aside. Boil Beans and keep it aside too. For pico de Gallo, chop onions,tomatoes and coriander. In a bowl mix well adding lemon juice and salt. Chop some Lettuce. Grate some sharp cheddar cheese. For stir fry vegetables: chop all the vegetables of your choice, in a pan heat Olive oil and add the vegetables. Mix in salt, pepper, cumin powder, and dry oregano leaves.(donot over cook the vegetables). Assemble all of the above Ingredients in a wide bowl. Savour!

Notes:

1. You can boil corns and add to the bowl.

2. You can skip the vegetables and grill cottage cheese or you can add cottage cheese to your vegetables.

3. You can drizzle chipotle sauce on top.

4. You can add some sour cream. It makes the bowl more tasteful.

I hope you take a stab at this recipe- it’s seriously delicious. Make sure to tag me in any food pics you take of this dish, and I’ll catch you soon.

COOK. EAT. HAPPY!!

Carrot Salad

Healthy eating means eating a variety of foods that give you the nutrients you need to maintain your health, feel good, and have energy. These nutrients include protein, carbohydrates, fat, water, vitamins, and minerals.

Nutrition is important for everyone. When combined with being physically active and maintaining a healthy weight, eating well is an excellent way to help your body stay strong and healthy. A healthy diet may contain fruits, vegetables, and whole grains, and includes little to no processed food and sweetened beverages.

The basic principles of good diets are so simple that I can summarize them in just ten words: eat less, move more, eat lots of fruits and vegetables. For additional clarification, a five-word modifier helps: go easy on junk foods. Follow these precepts and you will go a long way toward preventing the major diseases of our society.

A SALAD A DAY KEEPS DISEASE AND AGING AT BAY!

Aside from their natural good taste and great crunchy texture alongside wonderful colors and fragrances, eating a large serving of fresh raw vegetables each day can have significant health benefits. Add a couple of tablespoons of mixed raw or roasted seeds like pumpkin, sesame, sunflower and ground flax or chia to boost your daily intake of good fats. Also adding a healthy fat to your salad via the dressing, or by adding healthy dry fruits and berries will also make it more filling, as fats are among the most satiating.

Sunflower seeds

With the hot summer weather arriving quickly, a cool crisp salad can be the basis for a light and refreshing meal.

This carrot salad is made with a variety of nuts and berries, and is tossed in a flavourful dressing. The crunchy nuts give it a good texture and the berries add to the sweetness, which eventually balance the flavour.

Give this salad a try and don’t forget to let me know in the comments below!

Ingredients:

2 medium sized carrot shavings ( you can use grated carrots too) ( I’ll attach a picture to show the peeler I use to shave my vegetables)

1/2 cup apple shavings

1/2 tsp apple cider vinegar ( plain vinegar will also do)

1 tsp roasted sesame seeds

I tsp roasted sunflower seeds

2 tbspn mixed berries ( I used cranberries, raisins , blueberries and blackberries)

Freshly ground pink salt and pepper ( to taste)

1 tsp Thai sweet chilli sauce.

I tbspn chopped coriander leaves

Sliced pistachios ( for garnishing)

Method:

In a large bowl toss all of the above ingredients. Sprinkle pistachios. You can chill it before serving.

Peeler

Veg. Mexican Patty Sub


submarine sandwich, also known as a sub, is a type of sandwich consisting of a length of bread or roll split lengthwise and filled with a variety of meats, cheeses, vegetables, and condiments.The sandwich has no standardized name,with over a dozen variations used around the world.

World Health Day

The World Health Day is celebrated every year on April 7 to spread the awareness around maintaining good health and a balanced lifestyle.This year’s World Health Day theme couldn’t be more apt as it is dedicated to honour the indefatigable work of nurses and midwives across the globe.In the wake of the coronavirus pandemic, thousands and millions of nurses are leaving behind their comfort and safety to fight the Covid-19 crisis and help those infected or suspected of coronavirus.

On this day, the World Health Organization calls for people to extend their gratitude and support nurses and midwives across the world. The WHO has named this year the ‘International Year of the Nurse and the Midwife’. 

Sandwiches are one of the most popular breakfast choices.They’re quick, delicious, and, if properly portioned, an option for healthy meal. Veggies add both nutrients and flavor to the sandwich- Tomatoes, fresh greens lettuce, red onion, cucumbers and peppers are all good choices. Adding patties can add crunch and taste to the sandwich. You can pan fry the PATTIES which require minimal oil.

On this World Health Day I’m sharing a healthy Sub recipe. I hope you’ll like it.

Ingredients for Mexican patty:

1/2 cup boiled and mashed rajma

3 potatoes boiled and mashed

1 small carrot finely chopped

Few beans finely chopped

1 onion finely chopped

1tsp grated ginger

1tsp grated garlic

Salt and pepper to taste.

4 tbspn corn flour/ rice flour ( for binding)

You can add bread crumbs too.

Maida to coat the PATTIES before frying

For toppings:

Fresh lettuce

Sliced onions, tomatoes, onions,cucumbers

Chopped capsicum

Sauces ( optional)

Mint sauce

Mayonnaise

Chipotle sauce

Mustard sauce

Salt and pepper.

Bread ( baguette ) / burger buns/ regular bread

Cheese slices

Method:

To make patties: mix all the ingredients mentioned under patties. Shape the mixture using your palms. Give the shape according to the bread you’re using. ( For eg. If using a baguette make rectangular patties, for burger buns make round patties). Coat with maida and Keep it in the refrigerator for about 2 hours before frying. On a non stick tawa place the PATTIES and pour oil. Flip and cook.

Patties

Slit the baguette length wise.Lightly Toast the home made Baguette ( click here for the recipe ). Place the cheese slices and the patties on the base on the bread. Top it with you favourite vegetables. “Life is like a Sandwich- the more you add to it the better it becomes”. Sprinkle freshly ground salt and pepper. Add sauces. Cover it with the other slice.

You’re ready to eat a healthy crunchy meal!

Comment and let me know how you like your sandwich!

Design a site like this with WordPress.com
Get started